Lazy Beancount UI
Description
Lazy Beancount UI has several sections available via menu in the title. Fava just includes Fava interface in an iframe, and it’s also available in a separate tab (running on another port) via a link in the footer. The other tabs will be introduced in the following sections.
Since from now on you will add your own data, don’t forget to restart Lazy Beancount on your data folder:
./lazy_beancount.sh data
(or env UID=$(id -u) GID=$(id -g) docker compose up from the data folder).
Defining accounts
Head out to the Config tab. There you can edit several various config and data files (all located in your data repository). The first one we’ll need is accounts_config.yml which is a YAML file with definitions of all your primary accounts and the currencies they can hold.
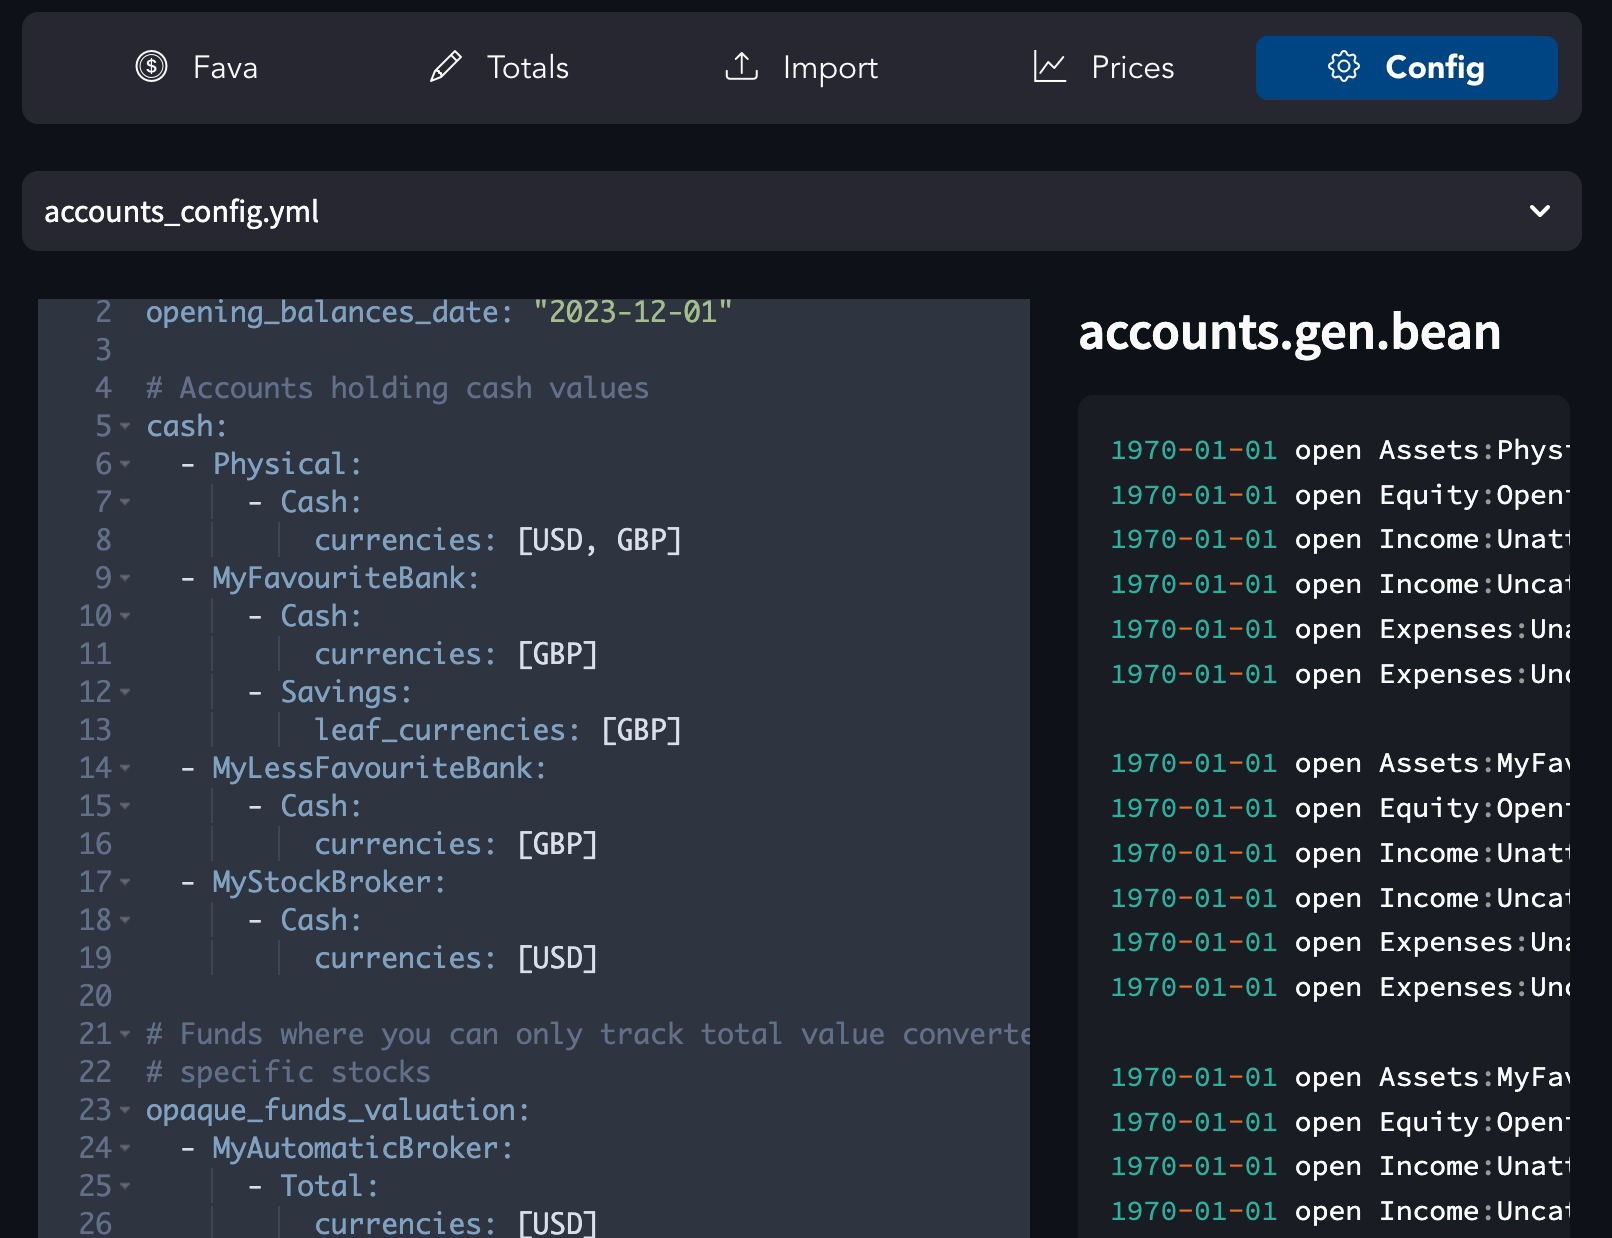
Configure accounts_config.yml
Change the opening_balances_date to the date from which you will roughly have the first data (for example, the earliest statements you will want to import).
Then follow the example to define your bank, broker and other accounts in the corresponding sections of the file, following the example. One account may contain multiple currencies, you can supply a list in the currencies key. Also you can use booking_method to define a booking method for authomatic cost basis selection (that will apply for tracking Investments).
Then click on the CMD+Enter to apply changes, and then on Save button that will not only save the file but also generate the accounts.gen.bean file with required account definitions.
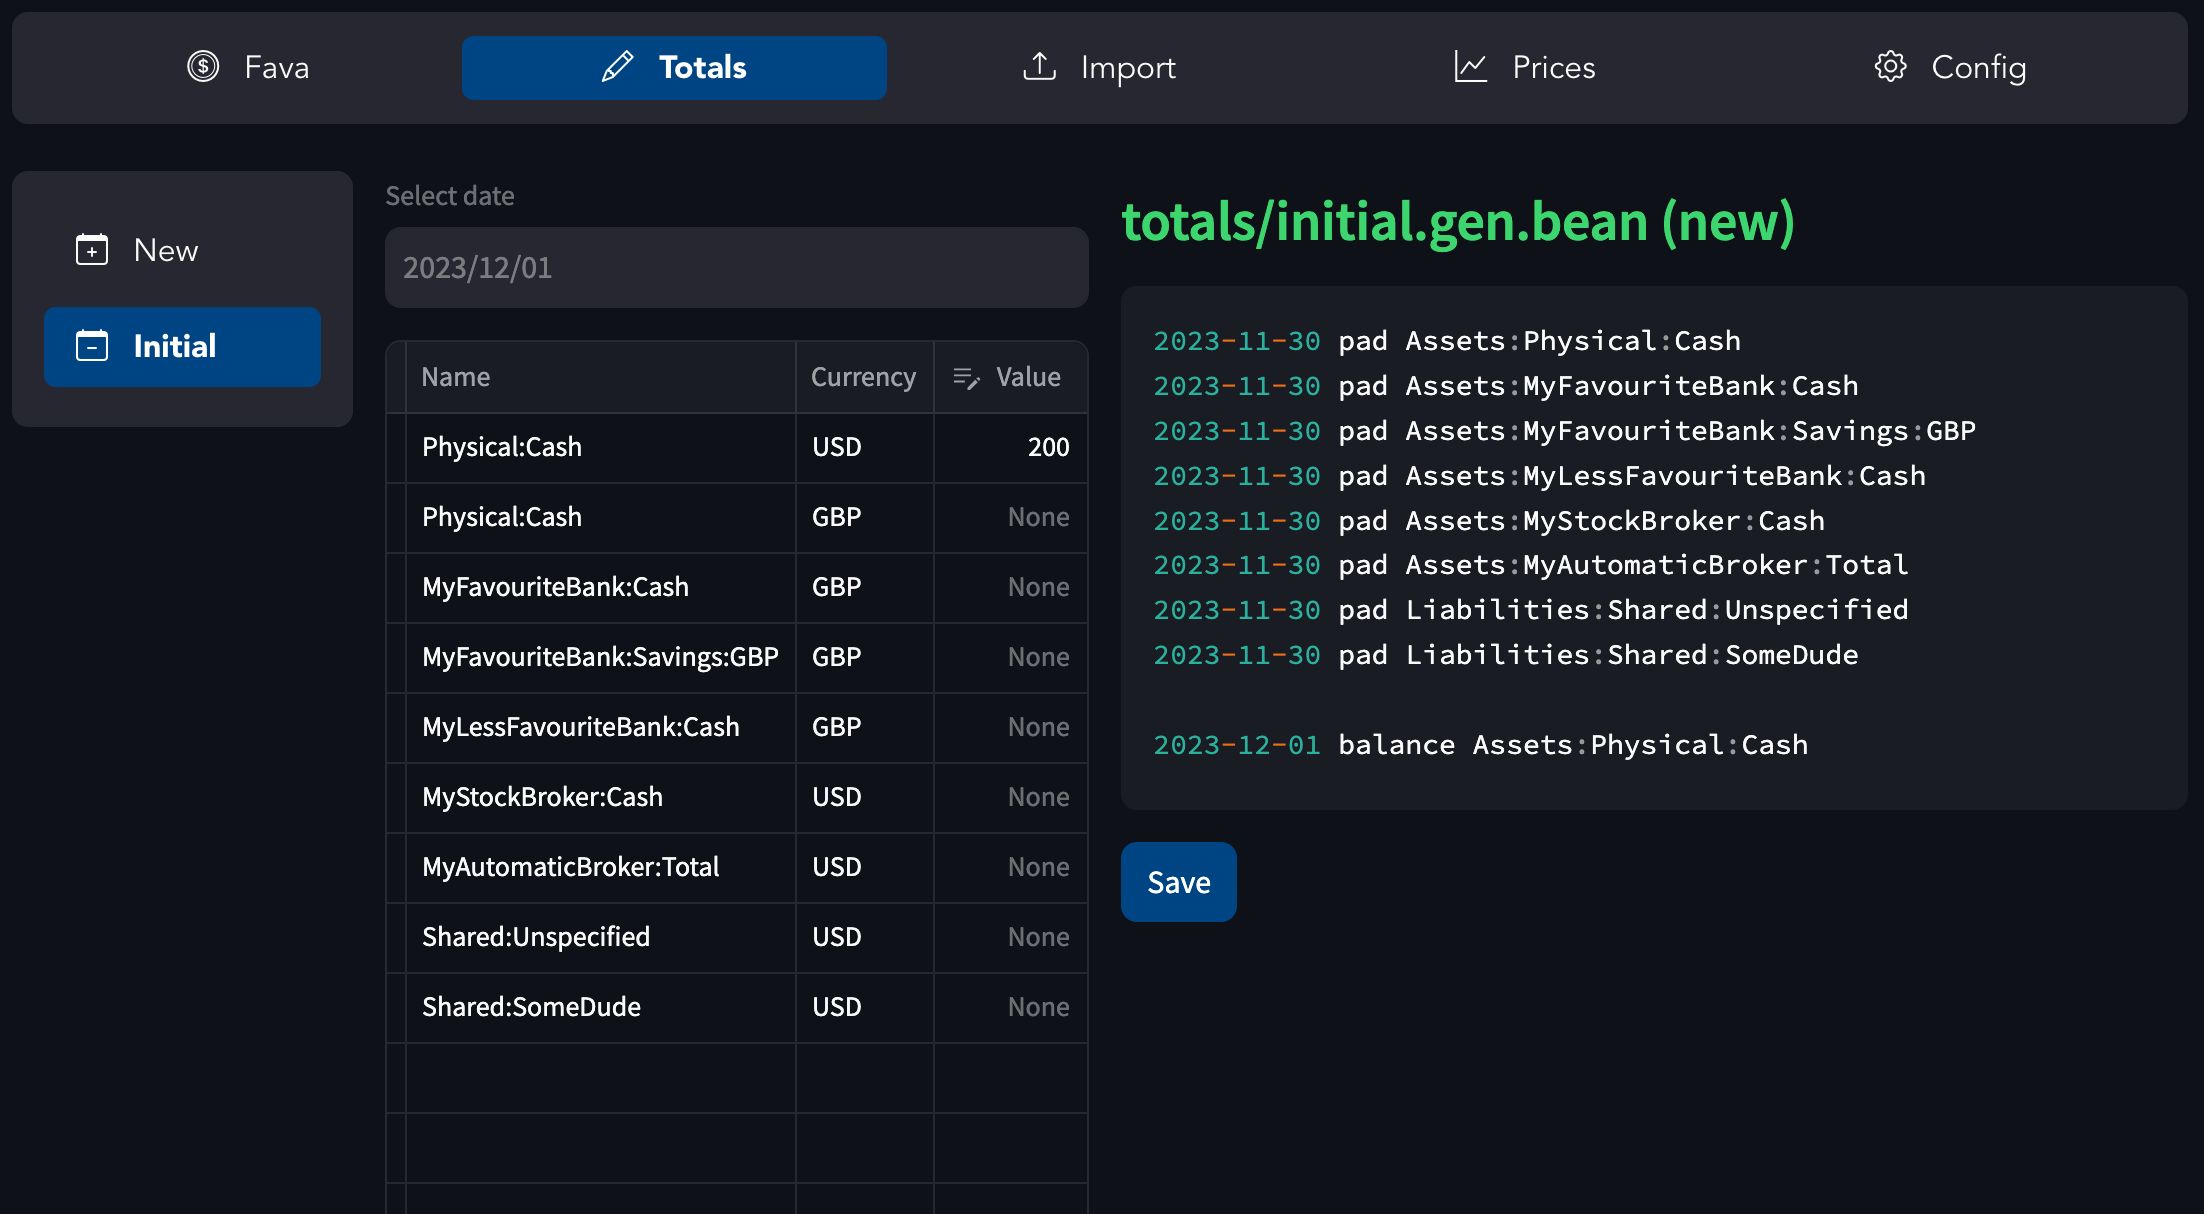
Add initial data point
Go to http://localhost:8777/totals and select “Initial” in the left column. Enter values of the accounts at the initial date if you know them. If you don’t, leave them empty. Click on “Save”. This will generate totals/initial.gen.bean file.
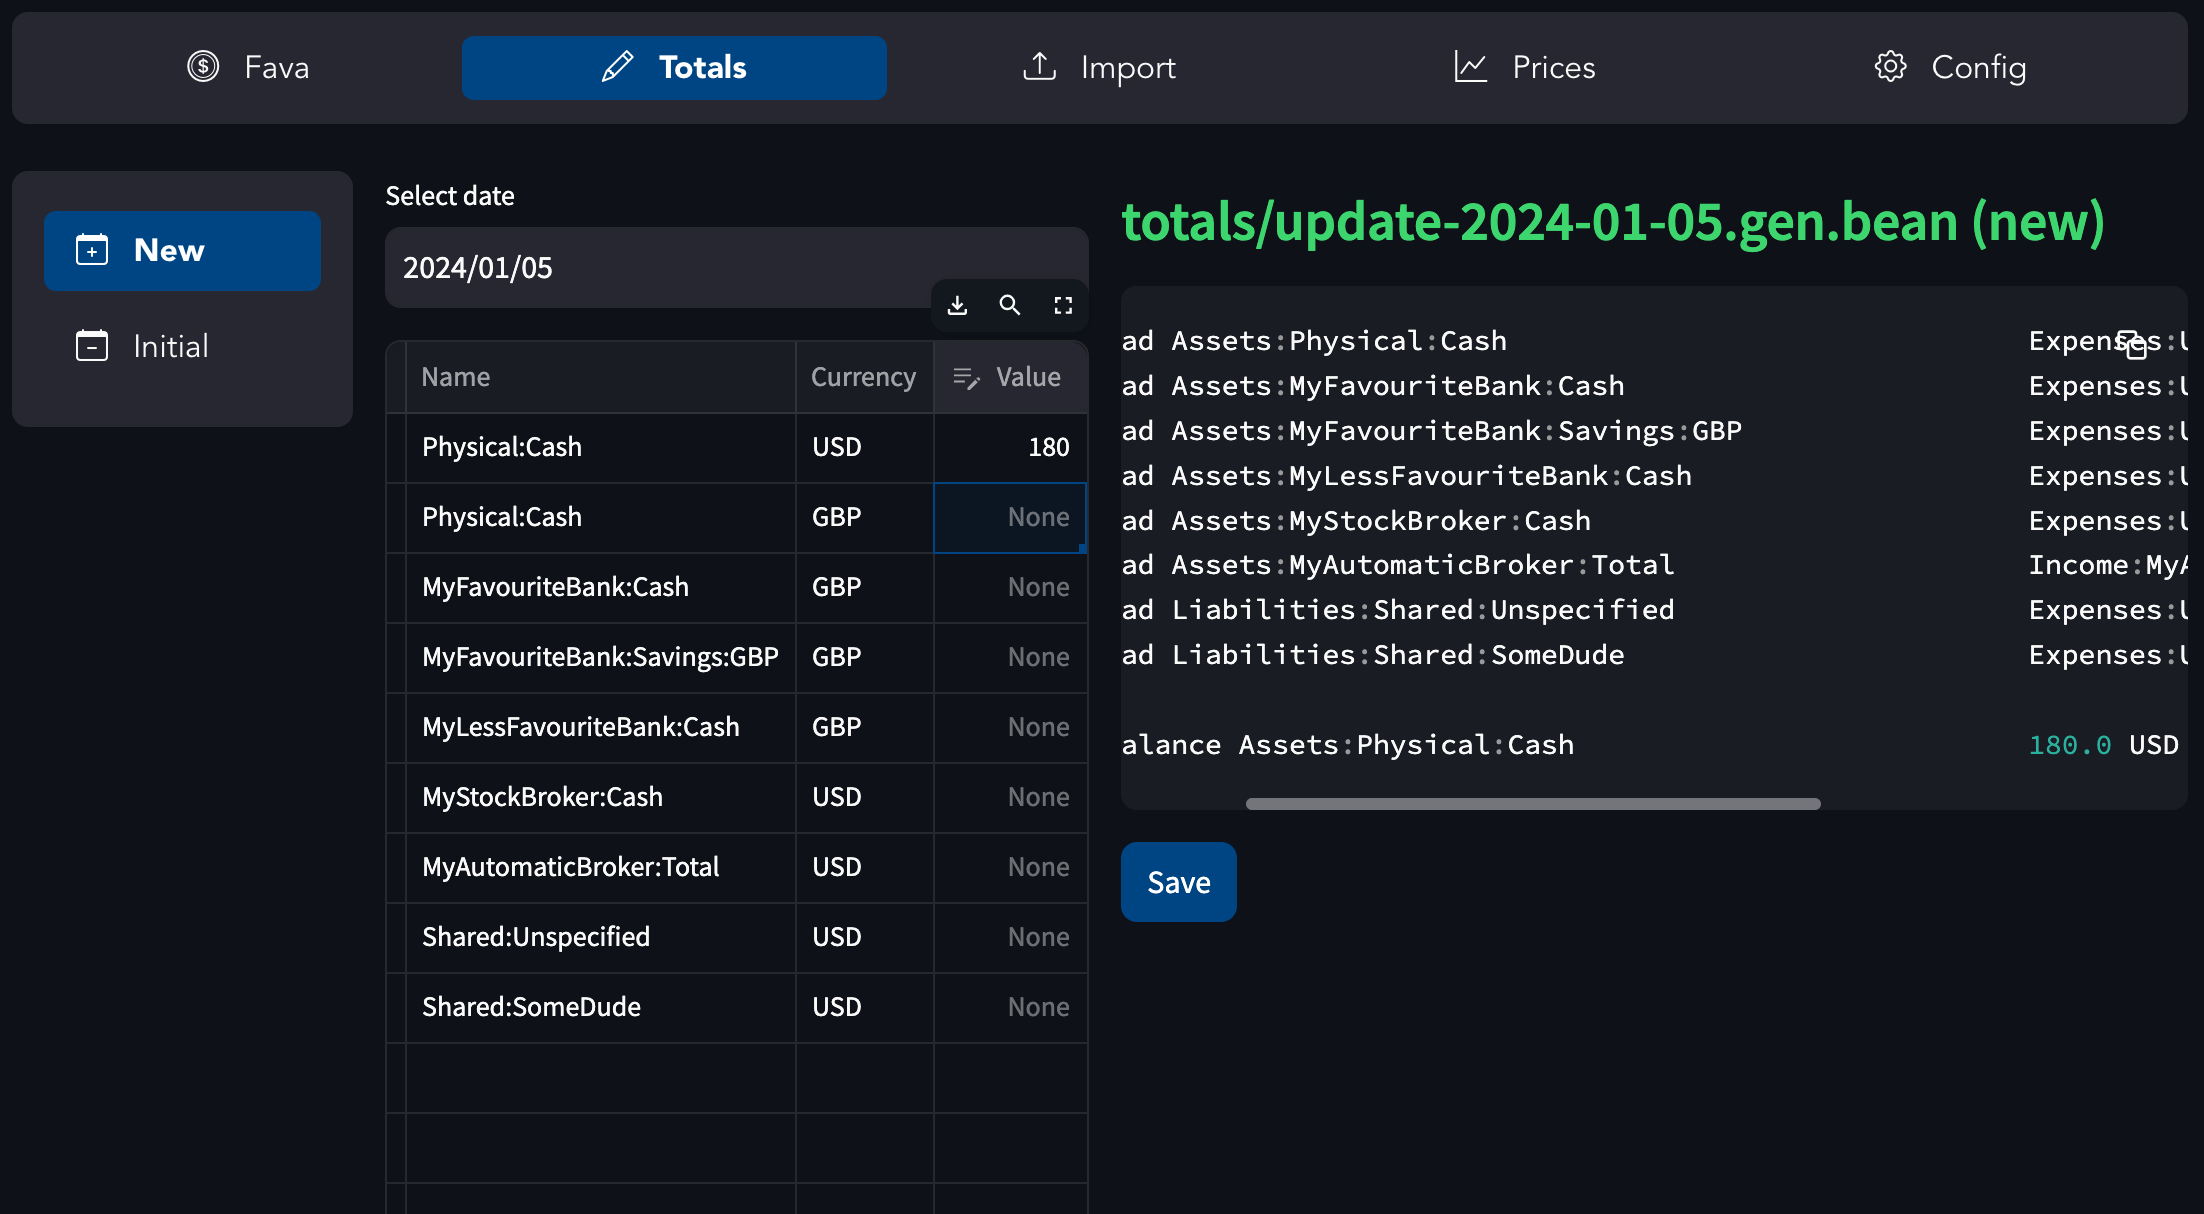
Today’s values
On the same page (http://localhost:8777/totals) select “New”. Enter current values for all your accounts (as they were at midnight before any day transactions happened). That means just go through your apps, web pages of financial institutions and maybe counting your physical cash manually.
When you click on “Save”, the new file will be saved under the totals/ folder.
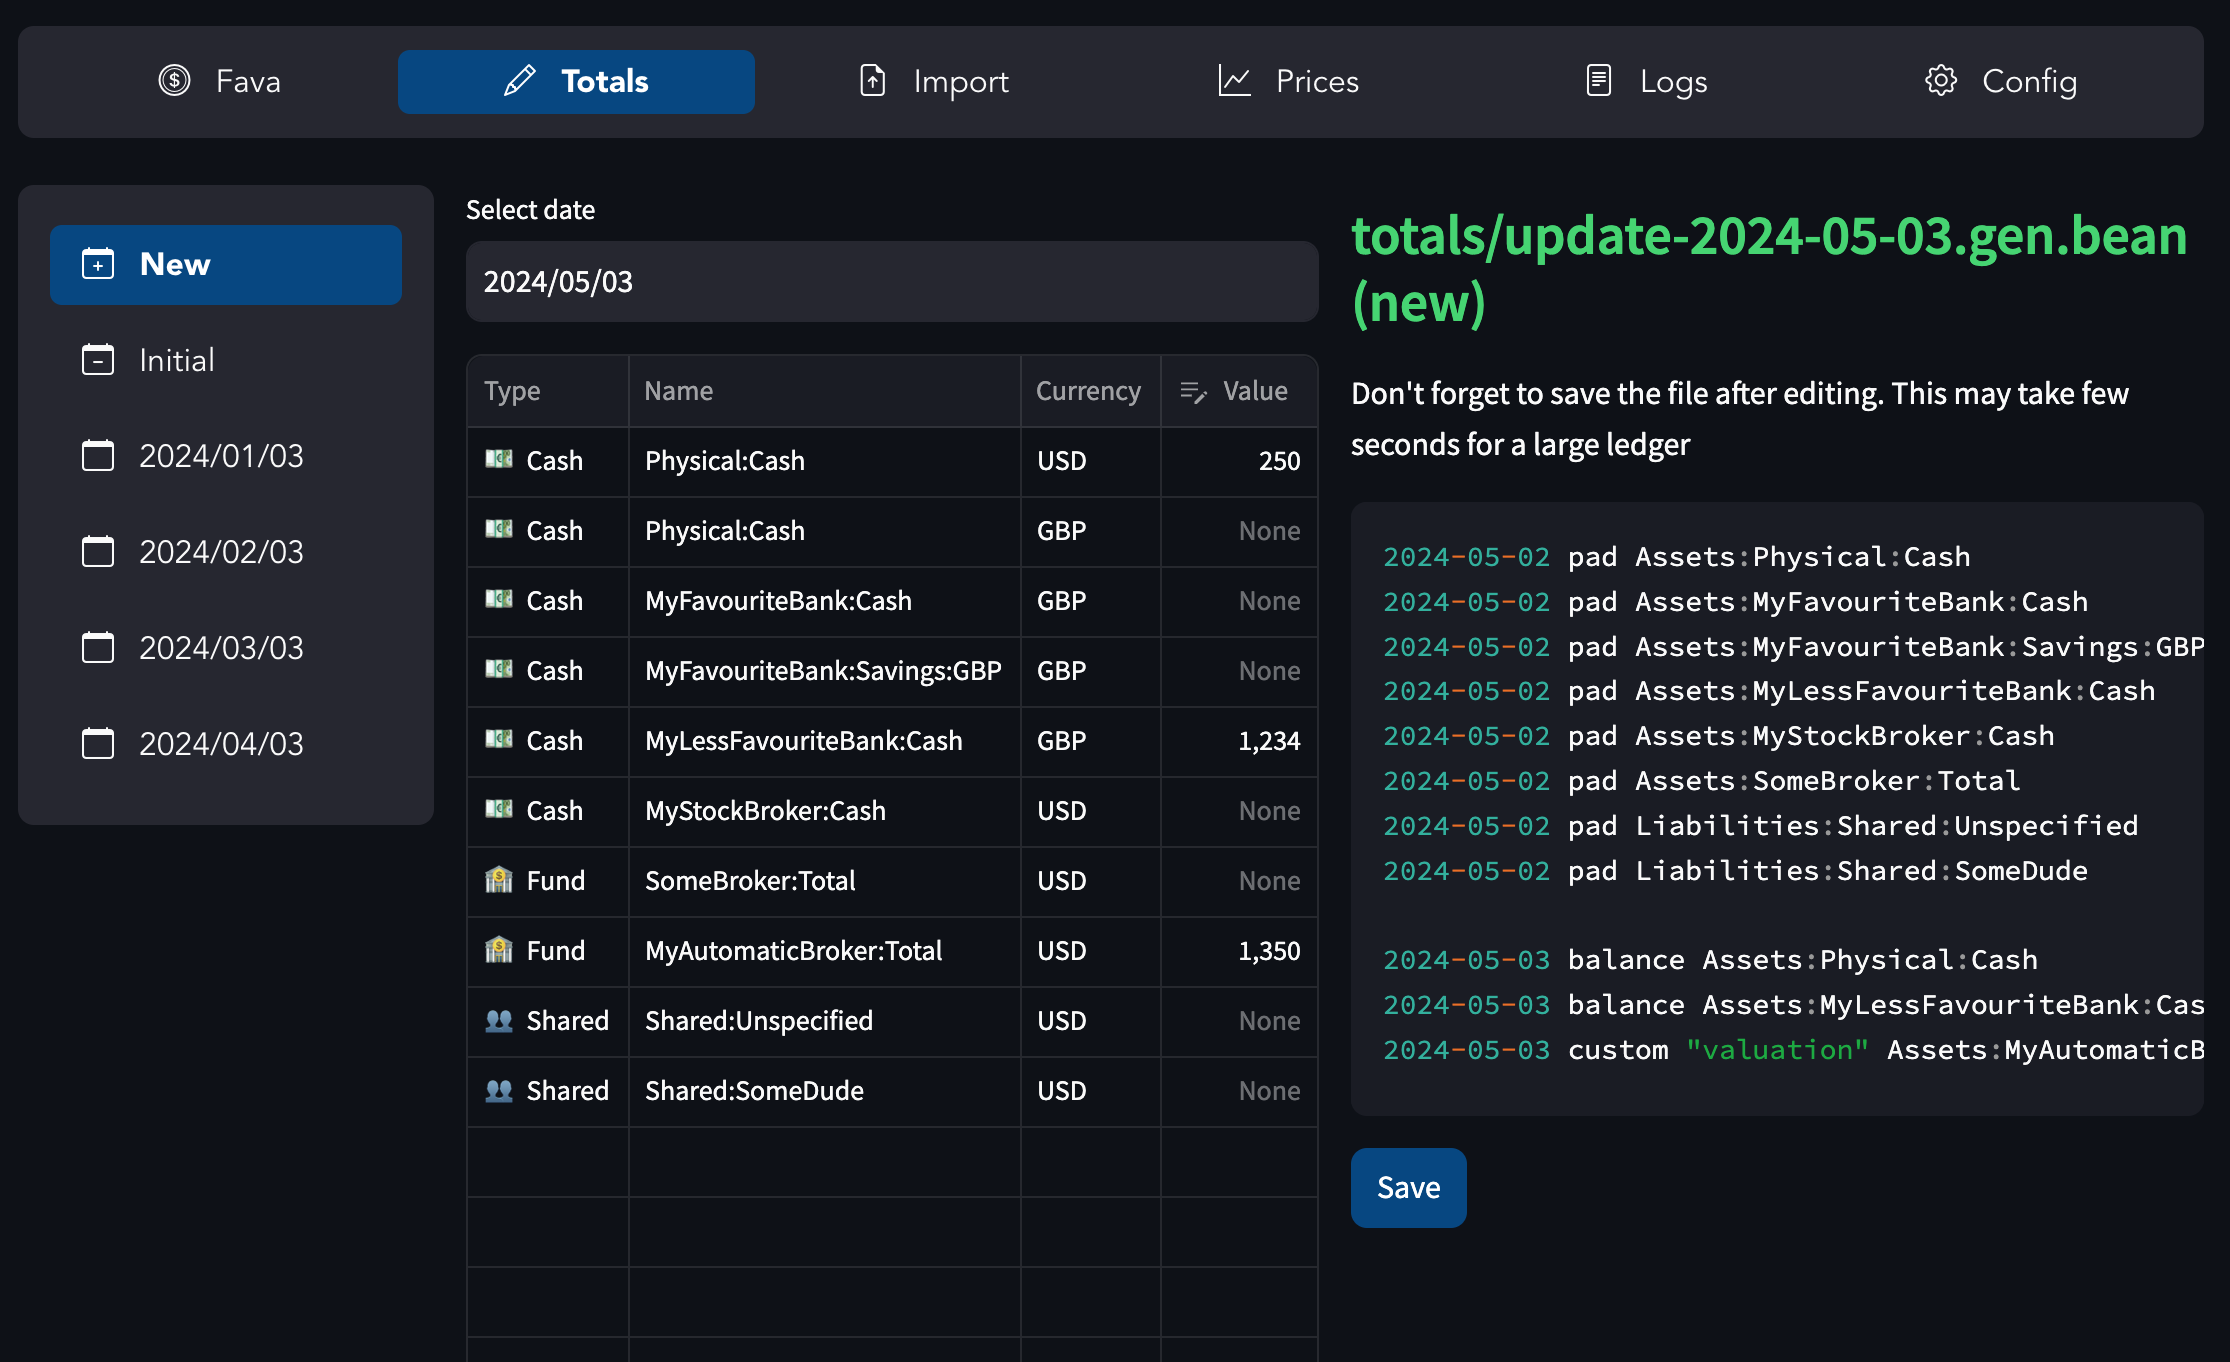
Adding data points later
When you want to add another data point (say, in a week), you can either use the “New” button again or copy the previous values and then update them. To do the latter, select the latest file on the left, then change the date in the interface, and click “Save” (optionally), then edit values and click “Save” again. That may save you some time if values of some accounts haven’t changed or didn’t change that much (will be harder to make a mistake and put in a completely different value).
Finally
After you have a couple or more data points, some graphs will start working with your data.